Saturday, February 29, 2020

Create Your Retreat

It is that time of the year again for the Create Your Retreat at Seven Feathers Casino. The dates are March 6th and 7th. I will be teaching a class this year on Friday at 4:30 to 6:00. You will be learning 3 cards this year. Cost is $27.00 for the class if you register before retreat online or if you register at the retreat it will cost $29.00. 
The supplies you will need:
Scissors large and small with a fine tip
Daubers
Art Glitter dries clear glue with a tip (this can be ordered thru Heartfelt Creations or Amazon)
Tape
Flower shaping tools
Work mat

The cards I am teaching will be colored ahead of time, so no ink pads are required, this will save time in the class  My goal is for you to complete your cards and walk away happy.

Here is a link for you to go to sign up for classes http://create-your-retreat.mybigcommerce.com
Please email me if you have any questions about my class at gailcommon@gmail.com


Thursday, February 13, 2020

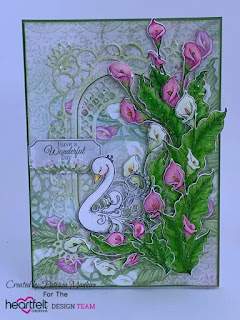
Heartfelt Creations Calla Lily Class

My next class coming up is February 27th at 10:00 - 3:00 at my house I will be teaching Heartfelt Creations Calla Lily cards. There will be three cards and the cost is $20.00. You will need to bring your lunch and I will have coffee or tea. The supplies you will need to bring are Large and small scissors, sponge daubers, dimensionals, the glue that dries clear, double stick tape, blender pens and whatever you want to color with color pencils, Copics, ink pads it is your choice and what you are comfortable using. Don't worry if you are new to this I will have things for you to use. This class is fun and you will be pleased with what you go home with. If you have never made cards before is class is for all levels. If you have any questions about the class just send me a message and I will get an answer as soon as possible. Looking forward to seeing you.


Monday, February 3, 2020

Create Your Retreat

It is that time of the year again for the Create Your Retreat at Seven Feathers Casino. The dates are March 6th and 7th. I will be teaching a class this year on Friday at 4:30 to 6:00. You will be learning 3 cards this year. Cost is $27.00 for the class if you register before retreat online or if you register at the retreat it will cost $29.00. 
The supplies you will need:
Scissors large and small with a fine tip
Daubers
Art Glitter dries clear glue with a tip (this can be ordered thru Heartfelt Creations or Amazon)
Tape
Flower shaping tools
Work mat

The cards I am teaching will be colored ahead of time, so no ink pads are required, this will save time in the class  My goal is for you to complete your cards and walk away happy.

Here is a link for you to go to sign up for classes http://create-your-retreat.mybigcommerce.com
Please email me if you have any questions about my class at gailcommon@gmail.com


Sunday, January 12, 2020

Heartfelt Creations Wilderness Retreat Card Class

Heartfelt Creations Wilderness Retreat Card Class Janurary 30, 2020 at my house at 10:00. Cost of class is $20 for 3 card kits. You will want to bring a lunch with you. I have coffee and tea to drink. Class last for about 3-4 hours depending how long it takes you. It is a very relaxed class. You will need to bring your basic card tools. Scissors, bone folder, glue dries clear with a tip, daubers, ink pads, or pencils, Copics or whatever you want to color with, paper trimmer and score pal, Dimensionals.
Here are some of the colors I used on my cards to give you some ideas on coloring, please bring what you have and you're comfortable with using.
Ranger Distress Inks: tumbled Glass, Scattered Straw, Peeled Paint, Mowed Lawn, Brushed Corduroy, Broken China, Pumice Stone, Vintage Photo, Black Soot Evergreen Bough.
If you're looking for guy cards these are beautiful. Hope to see you here, please message me to let me know if you will be in class. I only make 10 kits up so seating is limited.


Saturday, November 9, 2019

Heartfelt Creations Sea Breeze Collection Class


Nov.26th at 10:00 there will be a Heartfelt Creation Sea Breeze Class here at my house. Cost is $20.00 for 3 cards.
Bring your basic card tools, daubers, glue, tape, scissors. You can use pencils, Copics, any markers you like. The colors of ink I used is Archival Ink Pad - French Ultramarine, Archival Ink Pad - Coffee
Archival Ink Pad - Viridian
Archival Ink Pad - Sepia
Archival Ink Pad - Forget-Me-Not
Archival Ink Pad - Leaf Green
Archival Ink Pad - Magenta Hue
Archival Ink Pad - Buttercup
Archival Ink Pad - Tiger Lily
Archival Ink Pad - Fern Green
Archival Ink Pad - Red Geranium
Archival Ink Pad - Garden Patina
Memento Dye Ink Pad - Paris Dusk
Memento Dye Ink Pad - Desert Sand
Memento Dye Ink Pad - Nautical Blue
Memento Dye Ink Pad - Rich Cocoa
Rajni Chawla's Crystal Clear glitter
Seas The Day Prills
These are some of the colors I used, but just bring what you have.
This I know is going to be a very popular class. So please let me know if you are planing on being here for. I have just 10 kits. Message me if you would like to take this class
Hugs Gail

Friday, November 8, 2019

A wonderful project to try from Heartfelt Creations I just had to share.

Create an elegant lantern perfect for any occasion!

Saturday, November 9, 2019 EZ Step by Step paper lantern tutorialPaper Lantern Tutorial

Paper lantern and lamps Paper lantern and lamps are one of the most creative and elegant ways to decorate your house. As the festive seasons are approaching you can enhance your festive decoration by creating a beautiful handmade paper lantern with layered flowers to add a handmade touch to your festive decor.

Directions:
Step 1: Cut a piece of cardstock of size 4 3/4" by 7 1/4".  Score at 1/2" on the left side and at the top.
Step 2: Snip off the corner at the top. Align the Starry Night Decorative die along the score line and cut as shown.
Step 3: You will need 4 pieces like this, also die cut a few pieces of the decorative border die from the same set.
Step 4: Cut 4 pieces of vellum card stock of size 4" by 6 1/2", glue it on the backside of the die cut pieces and fold the scored lines.
Step 5: Connect all the sides by gluing the scored folding edge on the back of each die cut pieces.
Step 6: Cut a small square piece of card stock of size 4 1/4" by 4 1/4" and adhere it on the folding edge at the top.
Step 7: Hold the lantern upright and fold the sides to adhere all the folding edges to the card stock.
Step 8: Now the Lantern base is ready.
Step 9: Glue the decorative borders at the top on all the sides.
Step 10: Now prepare shadow boxes of three different sizes for the lantern head. The shadow boxes are of the sizes 4 1/2" by 4 1/2" and height 1/2", 4" by 4" and height 1/2", 3 1/2" by 3 1/2" and height 1/2".
Step 11: Now glue the shadow boxes upside down on the top of the lantern.
Step 12: Now stamp the Flowers from the Classic Rose Cling stamp set on Deluxe flower shaping paper using Archival ink Magenta Hue and color them using Memento ink Rose bud and angel pink.
Step 13: Stamp the leaves from the leafy accents cling stamp set using archival fern green and color using memento Bamboo leaves and olive grove.
Step 14: Cut the flowers and leaves using the coordinating dies.
Step 15: Shape the flowers and leaves using the 3D Shaping molds.
Top Tip: Layer the diecuts in the mold to shape more at one time. You can layer up to three in each section. 
Step 16: Glue the flowers and leaves on top of the lantern as shown.
Step 17: Place the lantern on top of a Flameless Candle.
     Tutorial by designer Heena Shaikh.
Have fun creating your own projects! We love to see what you create too, share your projects with us on our Facebook page here https://www.facebook.com/HeartfeltCreations

Here is a list of supplies used so you can make one too!
Heartfelt Creations Products Used:


 Classic Rose Cling Stamp Set


Sunday, September 8, 2019

Our next class is Sept. 28th Thursday at 10:00 at my house. You will need your basic card making tools, flower tools, Dries clear glue, scissors, daubers, Heart of gold Prills.
The inks I used are Archival Inks - Carnation Red, Leaf Green (medium green)  Library Green (dark green) and Cobalt Blue.
ColorBox - Frost White, Memento Ink Lady Bug, Bamboo Leaves. But these are what I used because of the instructions for the cards. I want you to bring whatever you want to use pencils, markers, Copics. Please bring your lunch with you. I will have coffee and tea here. These are really pretty cards  and anyone would love to receive them. Looking forward to seeing you all and having some card making time. Please let me know you are coming to class so I can save a kit for you. Email me with any questions or go to my Facebook page and message me. Thanks Gail